The world of building a PC is fun exciting and sometimes daring. But don’t worry, the best way to learn is from the mistakes of others. We have made this list from personal experiences and reading online complaints from different people. Here are the Mistakes People Make while Building a Gaming PC.
Cabinet for Gaming PC
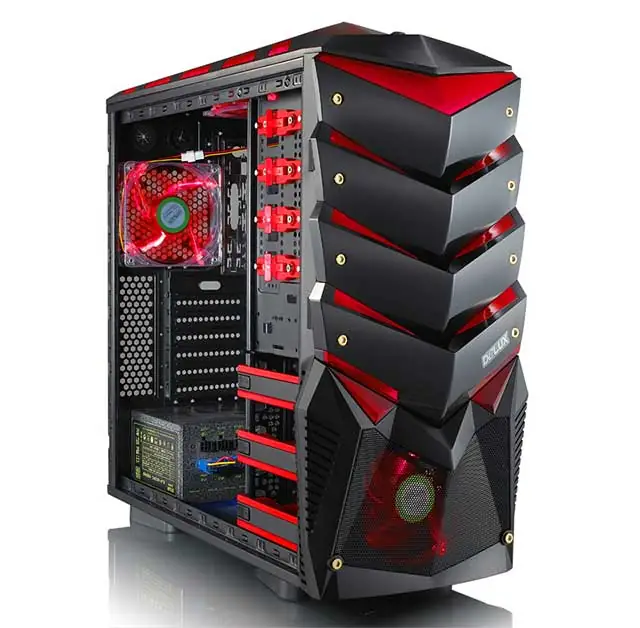 Let’s talk about mistakes we make while buying a Cabinet for your Gaming PC. Spending money on a giant case when you don’t really need it, it is something that happens often. And it really bothers me, sure you have the freedom to get whatever case you want. And technically there is no problem in having a big cabinet, but just think, you might have spent an extra 150$ on that bigger awesome cabinet. Yet you don’t have the plan to add a water cool system or extra drives.
Instead, you could get a more reasonable sized cabinet and put that extra cash to something more useful. Well, some people will argue that you shouldn’t even spend that much money on a case at all. We see that on a lot of builds threads, Buying for looks doesn’t necessarily mean much. When you could especially be putting it towards more computer power which is the bottom line. Besides that, some people get different cabinets for different needs like size, portability, work, VR, etc. Therefore, it’s really up to you and your needs that cases are where your budget can see the most a band flow.
Cable Managment
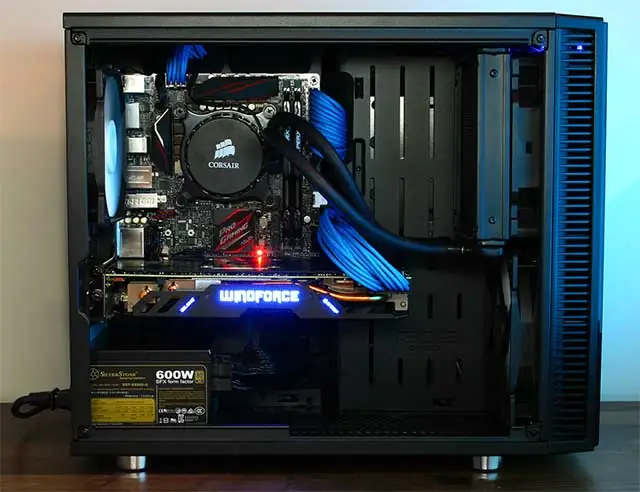
Well, it is the obvious thing but it needs to be known from the very start of your build. Think long and hard about proper cable management. No one wants their PC to be a mess of tangled wires, do they? It is not only necessary for a good looking and well-arranged PC, but it is also practically necessary.
I personally learned it the hard way during one of my first builds. I had cables everywhere that acted as dust magnets, but when it came time for me to replace or upgrade a component. The mess I had left behind was just a disaster. To replace a component from my PC I had to unplug and rewire the whole set of wires. Besides that, with the help of zip ties, tubes, and well-designed cases there’s a lot of things you can do with your Gaming PC. Start with hiding cables in your Gaming PC build.
Motherboard Installation

I have seen a lot of people making a mistake while installing the motherboard. Don’t mess up the installation of the motherboard’s standoff screws. or even more accurate don’t just skip them altogether or forget them. For the safety of your build, the motherboard needs to be raised off of the surface of your cabinet. And to do that you just typically install the little riser screws from 4 – 12 of them into your cabinet. So you can place the motherboard on top it.
Forgetting them or thinking you can skip them is a rookie mistake. Along with that just install them right make sure they’re compatible with your case, and screw in properly, and make sure they line up with the notches in your board. You don’t want a crooked motherboard that could cause problems down the line.
CPU
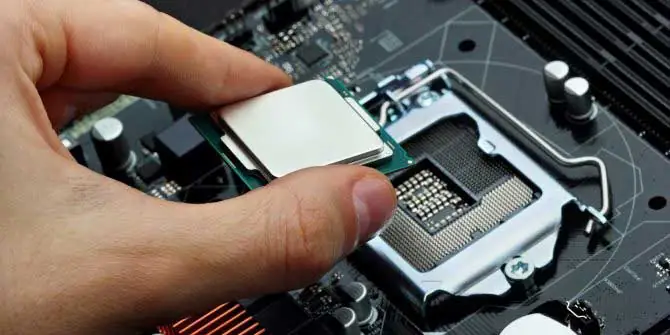
This is the thing a lot of first-time builders really get nervous about. You do get used to it but I still hold my breath while doing it. It’s the placement of the CPU to the motherboard, the whole build. Getting that thing directly on the socket requires one slow straight and not shaky placement downwards. It’s got to be deliberate, do not push hard on it or reshift it after it’s in place. Remember with most CPUs to follow that little corner triangle to show which way you are placing it whether it’s AMD or Intel.
The pins on the CPU are sensitive and you can bend them and screw them up really easily. So just be slow and careful and like I said deliberately on this part some people can fix bent pins after a mistake. But if you’re not a handy experienced person, it might be harder. This might not sound like a big deal to some, but you need to be mindful of all this. Because the CPU is obviously one of the more expensive parts to the build and no one wants to screw it up.
Heat Sink and Liquid Coolers
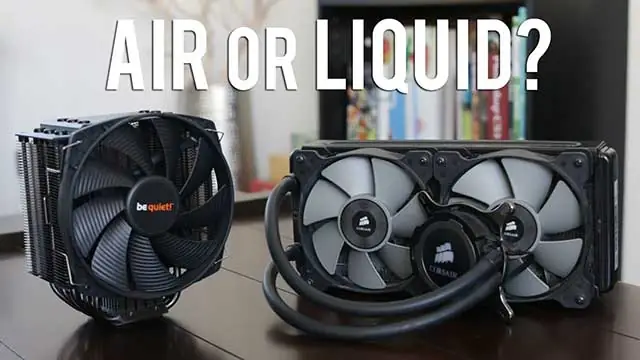
We have to recognize heat sinks and how they can get twisted sometimes. Sometimes heatsinks just don’t line up. Because if you have a closed system liquid cooler from Corsair, NZXT, or if you have enough courage to build your own. Then getting a nice and perfectly aligned cooler is easy you just bolt it on the motherboard. Air cooling setups need more attention because you need to bracket it down on the board. And after you apply thermal paste on the CPU it leaves room for it for movement and it shifts slightly while tightening it down and if you’re unlucky enough then, it is just a few degrees off from being perfectly aligned.
Well, I know this may not bother most of the people but it bugs the crap out of me. And I’m sure there are others who feel the same way, who are striving for the perfect Gaming PC build. Therefore, I am trying to make a bigger point here in terms of screwing things down and lining things up. Make sure you do it right. With certain components and attachments if you don’t like the way it looks. You should take your time and redo it. And it necessary to get it right while you go back and redo things. You need to be extra careful, go easy on screws you don’t want to strip them and basically, you just don’t want to rush any aspect of the build. And I think a ‘Twisted heatsink’ is a perfect way to point out that example.
Thermal Paste
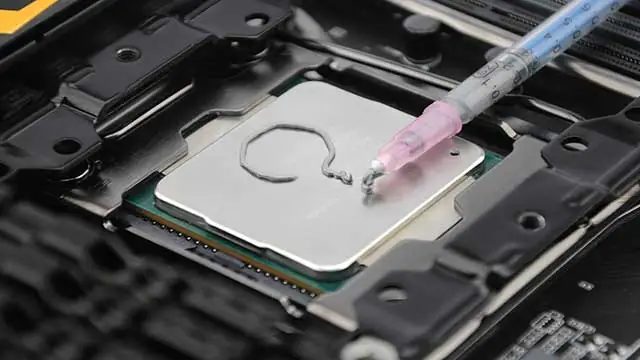
Thermal paste is a necessary part of the PC building process. And we know it can be a source of anxiety for a lot of newcomers. Apply way too little and your PC will just overheat and shut down, or your CPU can burn out. On the other hand, if you apply too much it can ooze out from under the cooler, onto the motherboard. It looks gross and it can potentially cause shorts in the system and just mess up your whole situation.
This can be made more complicated by choosing an unfamiliar compound. A compound that is too liquidy and just gets all over the place and you clamp down your cooler. Or a thicker compound that you aren’t quite sure how well it’ll spread out. It is a small thing that can make things get bad very quickly. And everyone will tell you slightly different things. So it’s a matter of both doing your research and also just being comfortable with the process. I always say the best knowledge you can have going into applying thermal paste and stuff like that is just confidence.
LED
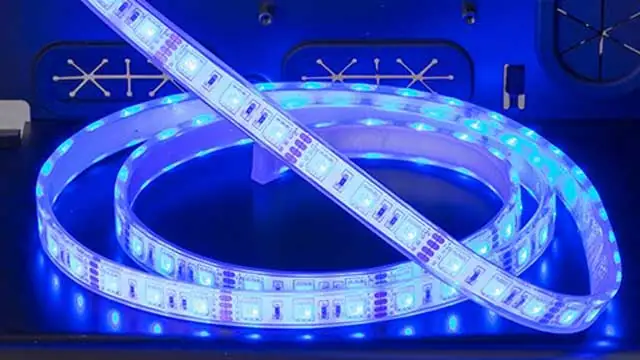
This is a matter of taste, but a lot of people feel passionate about this stuff. Be careful with LEDs, choose carefully and do it right so you don’t have a build that looks like a child’s toy. Some people here and there will argue to not bother with LEDs at all. But like I’ve been telling you in this whole list you do what you like. If you want to light it up, go ahead I’m not going to tell you what to do.
But if you are looking for advice, I always think LED fans look awesome. Take the time to understand the ins and outs of your specific cabinet. Hide LED strips or do subtle lighting instead because that stuff can make your case look cool and fancier. But then again this won’t matter much when you’re playing The Witcher 3 on Ultra.
Airflow
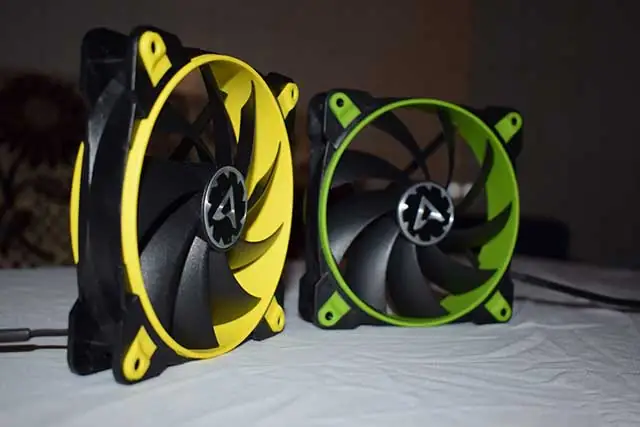
Now, we are not gonna get into the trivial details of different types of airflow strategies and pressure systems. But I will say that make sure you know the push-pull configuration of your fans and install them properly the first time. Besides that, there are a few things worse than installing your fans backward. Keeping all that hot air inside the cabinet and overheating all your components. So read the back of the box and plug all the cables in the right place. Also, make sure that fans are installed in the right direction.
And while we’re on the subject of component temperatures check your temperatures after you finish your build. And make sure everything is on optimal temperature. It’s best to know if you need more fans or to reapply thermal paste at the start. Rather than when you are in the middle of a gaming binge weeks later and things get too hot. It could still happen but we just see a lot of people make these mistake of not actually giving their Gaming PC a proper checkup once it’s built.
Connecting Power cables

This sounds obvious but if you’ve done it, you probably get it. It’s “not pushing” your power cables all the way in Properly. I know you just spent a lot of money on all the components for your new Gaming PC. Therefore. you are trying to be gentle and not break anything. After all, electronics tend to be a bit fragile a lot of times. The process of building a Gaming PC isn’t really a place for those sentiments though. You got to make sure everything is pushed into place until it clicks in securely. And power cables are no exception and a lot of people are missing the landing on that one.
These things require a lot of pressure sometimes so don’t get nervous. Sometimes it can feel like you’re about to bend or break the motherboard. But not securing such important connections will just lead to a headache down the line. This also goes for power connections on hard drives and video cards as well. However, the main power cable is the hardest one. You have to make sure all that stuff is in there until it usually clicks. This is one of the main issues when a new builder fires up their Gaming PC for the first time and it doesn’t start. Check your connections, maybe you were playing it too safe, just keep it in mind.
Shopping for Gaming PC

One of the biggest mistakes that first-time PC builders can make is when it comes to shopping. It is not uncommon to try and get the most for your money. When you’re shopping for parts compromising on brands and tiers of products is a fact of life for PC builders. However, you need to know when and where to do it. A lot of people spend way too much money on more low-impact parts and then skimp on something like the CPU or the graphics card.
If you’re building a high-end PC, consider spending more than $40.00 on a power supply. It really is “you get what you pay for” type of situation for some of the components. A cabinet is a cabinet, in hard drives, some of the manufacturers are more or less on par with each other for most people’s gaming needs. And give it a thought do you really need that $700 rog rampage 6 extreme motherboard?
Are you going to use all of the capabilities offered to you by it? Or would you be better served with a more reasonable motherboard and upgrading that core i5 to an i7 and adding some life to your rig with a little more computing power.
Ultimately, it’s your money to spend how you see fit. But maybe you should spend a bit more on the important parts that will be more noticeable in your day to day PC usage. I said about LEDs, I said about the size of a cabinet. The aspect of buying the right parts and all the shopping is the biggest hurdle to get over as a first time PC builder. So make sure you take your time and do it Right.


